Unlocking the Secrets of Responsive Navigation
My Journey Learning HTML and CSS
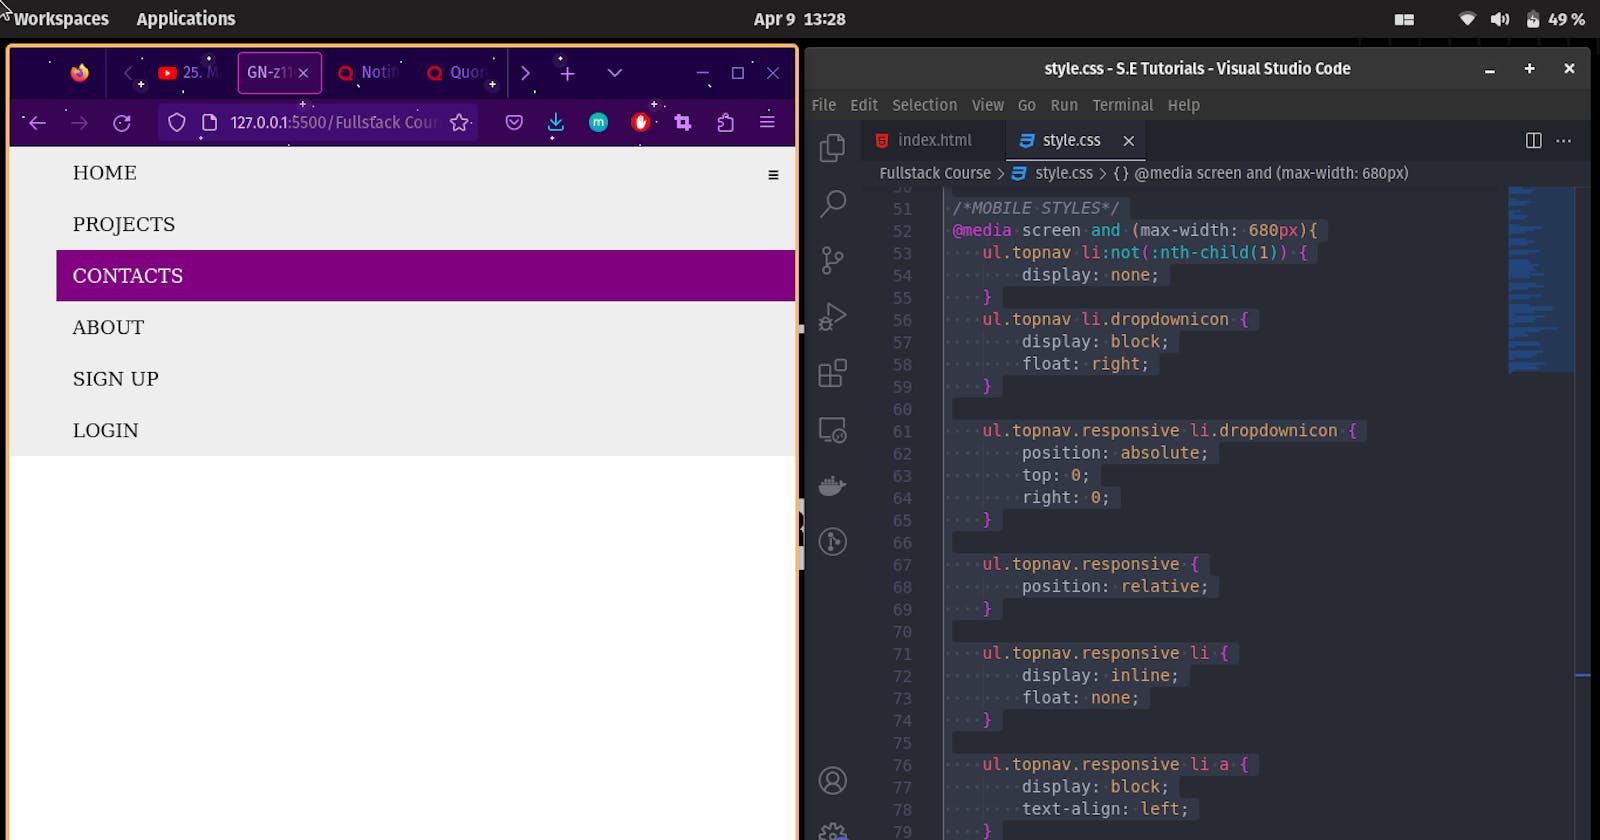
Today, I learned how to create a responsive navigation menu with HTML and CSS. It was a bit challenging at first, but I managed to understand it step by step.
To start, I created the HTML structure for my navigation menu using an unordered list, with each list item containing an anchor tag for the menu items. I also added a JavaScript function for the menu button.
Next, I wrote CSS code to style the navigation menu. I set the width of the menu to 100% and added some padding and background color to the list items. I also added a hover effect and changed the color of the text on hover. I used the float property to make the menu items align horizontally and the display property to hide the dropdown icon.
To make the menu responsive, I added a media query for screens with a maximum width of 680px. In this query, I set the display property of all list items except the first child to none, so they are hidden on smaller screens. I also added the dropdown icon and set its display property to block. I set the position of the dropdown icon to absolute, and I added a JavaScript function to show or hide the menu items when the icon is clicked.
Overall, it was an exciting and insightful learning experience for me. I was able to understand how to create a responsive navigation menu that looks good on all screen sizes using HTML and CSS.
Below are my HTML & CSS codes:
<!DOCTYPE html>
<html lang="en">
<head>
<meta charset="UTF-8">
<meta http-equiv="X-UA-Compatible" content="IE=edge">
<meta name="viewport" content="width=device-width, initial-scale=1.0">
<title>GN-z11Codes</title>
<link rel="stylesheet" href="style.css">
</head>
<body>
<nav>
<ul class="topnav responsive" id="dropdownclick">
<li><a href="#home">Home</a></li>
<li><a href="#projects">Projects</a></li>
<li><a href="#contacts">Contacts</a></li>
<li><a href="#about">About</a></li>
<li class="topnav-right"><a href="#signup">Sign Up</a></li>
<li class="topnav-right"><a href="#login">Login</a></li>
<li class="dropdownicon"><a href="javascript:void(0);" onclick="dropdownmenu()">☰</a></li>
</ul>
</nav>
<script>
function dropdownmenu() {
var x = document.getElementById("dropdownclick");
if(x.className === "topnav") {
x.className += " responsive";
}
else{
x.className = "topnav";
/*change topnav to topnav.responsive*/
}
}
</script>
</body>
</html>
/*DEFAULT*/
nav, header, footer {
    display: block;
}

body {
    line-height: 1;
    margin: 0;
}

/*NAVBAR*/
nav {
    width: 100%;
    margin: 0;
}

 nav ul {
    background-color: #eee;
    overflow: hidden;
    margin: 0;
 }

 ul.topnav li {
    list-style: none;
    float: left;
 }

 ul.topnav li.topnav-right{
    float: right;
 }

 ul.topnav li a {
    display: block;
    text-decoration: none;
    min-height: 16px;
    text-align: center;
    padding: 14px;
    text-transform: uppercase;
    color: black;
 }

 ul.topnav li a:hover {
    background-color: purple;
    color: #fff;
 }

 ul.topnav li.dropdownicon {
    display: none;
 }

 /*MOBILE STYLES*/
 @media screen and (max-width: 680px){
    ul.topnav li:not(:nth-child(1)) {
        display: none;
    }
    ul.topnav li.dropdownicon {
        display: block;
        float: right;
    }

    ul.topnav.responsive li.dropdownicon {
        position: absolute;
        top: 0;
        right: 0;
    }

    ul.topnav.responsive {
        position: relative;
    }

    ul.topnav.responsive li {
        display: inline;
        float: none;
    }

    ul.topnav.responsive li a {
        display: block;
        text-align: left;
    }
 }
